Wednesday, September 27, 2023

Working with Change Event Binding

 It specifies  action to perform when the value is changed in any element dynamically .It is mostly used with Range Numbers, Select Element

Example

ng g c eventsample4


.Ts File Changes

import { Component } from '@angular/core';

@Component({
  selector: 'app-eventsample4',
  templateUrl: './eventsample4.component.html',
  styleUrls: ['./eventsample4.component.css']
})
export class Eventsample4Component {
public Mobiles=[
  {Name:'OnePlus',Photo:'assets/OnePlus.jpg'},
  {Name:'Iphone',Photo:'assets/Iphone.jpg'},
  {Name:'Nokia',Photo:'assets/nokia.jpg'},
];
public Electronics=[
  {Name:'Samsung',Photo:'assets/Samsung.jpg'},
  {Name:'Sony',Photo:'assets/Sony.jpg'},
  {Name:'Aiwa',Photo:'assets/aiwa.jpg'},
];
public title:any;
public imgsrc:any;
public slidervalue:any=2;
public albumName:any;
public SlideShow()
{
  switch(this.albumName)
  {
    case 'MobileAlbum':
      this.title=this.Mobiles[this.slidervalue].Name;
      this.imgsrc=this.Mobiles[this.slidervalue].Photo;
    break;
    case 'ElectronicsAlbum':
      this.title=this.Electronics[this.slidervalue].Name;
      this.imgsrc=this.Electronics[this.slidervalue].Photo;
    break;
  }
}
}

.html Changes
<div class="container">
    <fieldset>
        <legend> Choose Photo Album</legend>
        <select [(ngModel)]="albumName" (change)="SlideShow()">
            <option value="MobileAlbum"> Mobiles</option>
            <option value="ElectronicsAlbum"> Electronics</option>
        </select>
    </fieldset>
</div>
<table width="600" border="0" cellspacing="5" cellpadding="5" align="center">
    <caption> Image Slide Show</caption>
    <tr class ="text-center">
        <td> {{title}} </td>
    </tr>
    <tr class="text-center">
    <td>
         <img [src]="imgsrc" width="400" height="250">
    </td>
    </tr>
    <tr class="text-center">
        <td>
            <input [(ngModel)]="slidervalue" type="range"
            value="0" min="0" max="2"
            (change)="SlideShow()">
        </td>
    </tr>
</table>

Next: Make changes to appmodule, and index.html as per previous examples

Output


On moving slider


Example 2:

Working with cascade dropdown

Add a new component

ng g c eventsample5

.ts File

import { Component } from '@angular/core';

@Component({
  selector: 'app-eventsample5',
  templateUrl: './eventsample5.component.html',
  styleUrls: ['./eventsample5.component.css']
})
export class Eventsample5Component {
  public categories=['Select Category','Electronics','Mobiles'];
  public electronics=['Select Product', 'Samsung TV','Sony TV','Aiwa TV'];
  public mobiles=['Select Product','Nokia','Iphone'];
  public datable=[
    {Name:'Samsung TV',Price:450,Photo:'assets/Samsung.jpg'},
    {Name:'Nokia',Price:4590,Photo:'assets/nokia.jpg'},
    {Name:'Sony TV',Price:40050,Photo:'assets/Sony.jpg'},
    {Name:'Aiwa TV',Price:750,Photo:'assets/aiwa.jpg'},
    {Name:'Iphone',Price:850,Photo:'assets/Iphone.jpg'},
  ];
  public prods:string[] | undefined;
  public mobprods:string[] | undefined;
  public lstCategories:any
  public lstProducts:any;
  public ProdName:any;
  public ProdPrice:any;
  public ProdPhoto:any;
  public qty=1;
  public GetDetails(index:number)
  {
    this.ProdName=this.datable[index].Name;
    this.ProdPhoto=this.datable[index].Photo;
    this.ProdPrice=this.datable[index].Price;
  }
  public SelectedCategoryChanged()
  {
    switch(this.lstCategories) {
      case 'Electronics':
      this.prods=this.electronics;
      break;
      case 'Mobiles':
      this.prods=this.mobiles;
      break;
      default:
        alert('Please Select Category');
        this.prods=['Select Product'];
    }
  }
  public SelectedProductChanged()
  {
    switch(this.lstProducts) {
      case 'Samsung TV':
        this.GetDetails(0);
        break;
      case 'Nokia':
        this.GetDetails(1);
        break;
      case 'Sony TV':
        this.GetDetails(2);
        break;
      case 'Aiwa TV':
        this.GetDetails(3);
        break;
      case 'Iphone':
        this.GetDetails(4);
        break;
      default:
        alert('Please Select Product');
    }
  }
}

.html File

<div class="container">
    <h2>Shopping Cart</h2>
    <table width="400" align="center">
        <tr>
            <td>
                <label class="control-label">Select Category</label>
                <select [(ngModel)]="lstCategories" (change)="SelectedCategoryChanged()"
                class="form-control">
                    <option *ngFor ="let item of categories">
                {{item}}
            </option>
            </select>
            </td>
        </tr>
        <tr>
            <td>
                <label class="control-label">Select Product</label>
                <select [(ngModel)]="lstProducts" (change)="SelectedProductChanged()"
                class="form-control">
                    <option *ngFor ="let item of prods">
                {{item}}
            </option>
            </select>
            </td>
        </tr>
        <tr>
            <td>
                <label class="control-label">Preview</label>
                <h3> {{ProdName }}</h3>
                <img [src]="ProdPhoto" width="300" height="250">
                <label class="control-label" > {{ProdPrice | currency:'INR'}} |  
                    Choose Quantity</label>
                <input [(ngModel)]="qty" [value]="qty" type="number" min="1" max="5">
                <label class="control-label">Total Amount : {{qty * ProdPrice }}</label>
            </td>
        </tr>
    </table>
</div>


Next, make changes to appmodule.ts and index.html file as per previous examples

Output


Event Binding in Angular Part

 What is Event

Event is a message sent by sender to its subscriber in order to notify the change.

Event follows a communication design pattern called observer.

Observer is a behavioural pattern which defines a communication between object and the action it have to perform.

Event uses an Event Handler that follows Delegate Mechanism(Function Pointer)

Event is associated with Browser in client side scripting and the browser event are categorized into three types

 Mouse Events

 Key Events

 Mis Events

Angular binds an event with any element by using the ()

Syntax:

<button (eventName)="function()">


Example of Event Handler  

Create a component

ng g c eventsample1


.TS File Changes

import { Component } from '@angular/core';

@Component({
  selector: 'app-eventsample1',
  templateUrl: './eventsample1.component.html',
  styleUrls: ['./eventsample1.component.css']
})
export class Eventsample1Component {
public ShowAlert()
{
  alert('Event Fire up');
}
}

ScreenShot


html changes
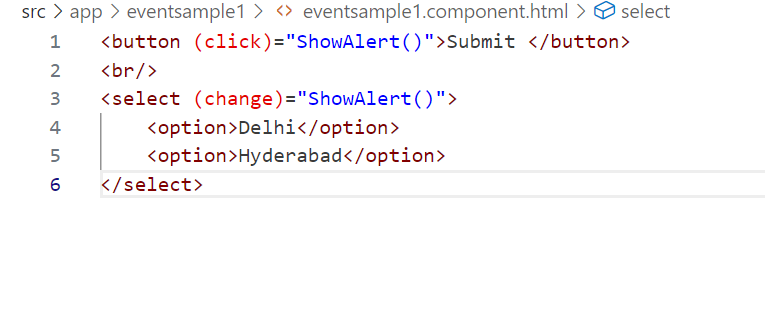
<button (click)="ShowAlert()">Submit </button>
<br/>
<select (change)="ShowAlert()">
    <option>Delhi</option>
    <option>Hyderabad</option>
</select>


Output:


Example 2:
Event Argument


Every point of browser with a set of properties like screenx, clientx, alt key, shift key, keycode,
etc

Event can pass the properties to function by using $Event as event argument.

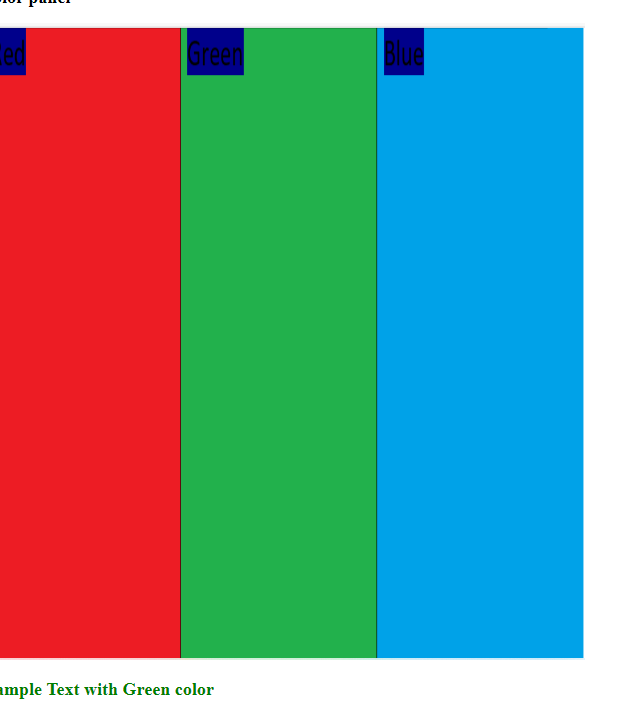
Example on Colour Panel

Red

Green

Blue


.ts Changes


import { Component } from '@angular/core';

@Component({
  selector: 'app-eventsample2',
  templateUrl: './eventsample2.component.html',
  styleUrls: ['./eventsample2.component.css']
})
export class Eventsample2Component {
public colorName:any;
public GetColor(eventArgs:MouseEvent)
{
  if(eventArgs.clientX>1 && eventArgs.clientX<=179)
  {
    this.colorName='Red';
  }
  else if(eventArgs.clientX>184 && eventArgs.clientX<=398)
  {
    this.colorName='Green';
  }
  else if(eventArgs.clientX>404 && eventArgs.clientX<=557)
  {
    this.colorName='Blue';
  }
}
public SetColor() {
  let color={
    'color': this.colorName,
  };
  return color;
}

ScreenShot


html changes
<div class="container">
    <h2> color panel </h2>
<img (click)="GetColor($event)"  width="800" height="850" src="assets/panel.png">
<br/>
<div>
    <h2 [ngStyle]="SetColor()"> Sample Text with {{ colorName }} color</h2>
</div>
</div>

ScreenShot


Output


When clicked on green Color


Blue Color


Example 3
With KeyEvents
Create Component

ng g c eventsample3

.TS Changes


import { Component } from '@angular/core';

@Component({
  selector: 'app-eventsample3',
  templateUrl: './eventsample3.component.html',
  styleUrls: ['./eventsample3.component.css']
})
export class Eventsample3Component {
public UsersData=[
  {UserId:'John'},
  {UserId:'John12'},
  {UserId:'John1234'},
  {UserId:'John123'},
  {UserId:'david'}
];
public UserId:any;
public Pwd:any;
public regExp=/^[A-Za-z]\w{7,14}$/
public msgUserId:any;
public msgPwd:any;
public min:number=0;
public max:any=0;
public value:any=0;
public low:any=0;
public high:any=0;
public CheckUserId() {
    for(let i=0;i<this.UsersData.length;i++) {
      if(this.UsersData[i].UserId==this.UserId)
      {
      this.msgUserId='User Id already Exist';
      return;
      }
      else{
        this.msgUserId='User Id available';
      }
    }
  }
  public GetGrade(min: number,max: number,value: number,low: number,high: number)
  {
    this.min=min;
    this.max=max;
    this.value=value;
    this.low=low;
    this.high=high;
  }
  public CheckPassWord()
  {
    if(this.Pwd.match(this.regExp))
    {
      this.msgPwd='Strong Password';
      this.GetGrade(1,100,100,60,80);
    }
    else{
      this.msgPwd='Weak Password';
      this.GetGrade(1,100,100,40,80);
    }
  }
}

.htmlChanges

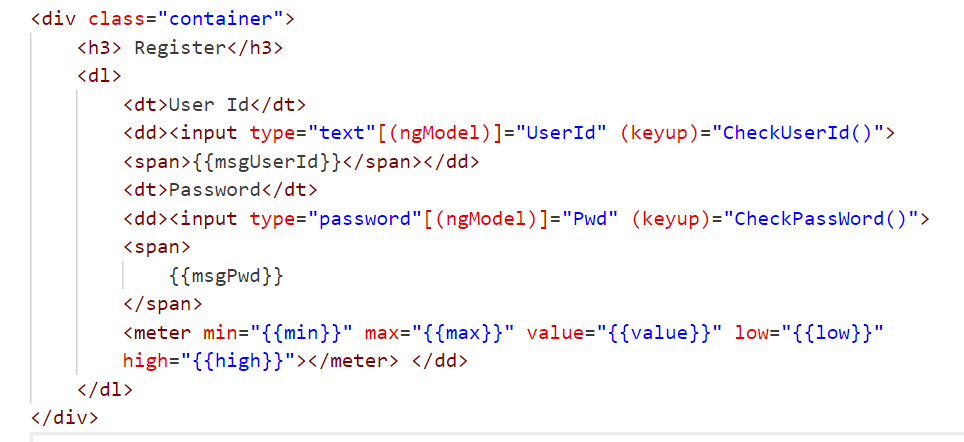
<div class="container">
    <h3> Register</h3>
    <dl>
        <dt>User Id</dt>
        <dd><input type="text"[(ngModel)]="UserId" (keyup)="CheckUserId()">
        <span>{{msgUserId}}</span></dd>
        <dt>Password</dt>
        <dd><input type="password"[(ngModel)]="Pwd" (keyup)="CheckPassWord()">
        <span>
            {{msgPwd}}
        </span>
        <meter min="{{min}}" max="{{max}}" value="{{value}}" low="{{low}}"
        high="{{high}}"></meter> </dd>
    </dl>
</div>

ScreenShot


Output


We can Also Add KeyCodes to check caps status by using keycode
In the above same code.
Add this method and declare the variable msg at the top(public msg:any)

public CheckCaps(event: KeyboardEvent)
  {
    if (event.getModifierState && event.getModifierState('CapsLock')) {
      this.msg='Caps is on';
     } else {
      this.msg='';
     }
  }

ScreenShot


Working with BootStrap for Angular Application

 Install bootstrap for your project

npm install bootstrap@3

Goto angular.json, file and add the below code

 npm install bootstrap@3


angular.json


            "styles": [
              {
                "input": "./node_modules/bootstrap/dist/css/bootstrap.min.css"
              },
              "src/styles.css"
            ],

.html changes
<div class="container">
    <form #fromlogin>
        <h2>Login Page </h2>
            <div class="form-group" ng-class="{ 'has-error' : true }">
            <label class="control-Label" for="Name" >Username</label>
            <div>
                <input class="form-control" name="Name" type="text" required >
                <span *ngIf="true" class="text-danger" >Name Required</span>
            </div>
        </div>
        <div class="form-group">
            <label class="control-Label" for="Pwd">Password</label>
            <div>
                <input class="form-control" name="Pwd" type="password" required>
                <span *ngIf="true" class="text-danger">Password Required</span>
            </div>
        </div>
        <div class="form-group">
            <button class="btn btn -block btn-primary">Login</button>
        </div>
    </form>
</div>

ScreenShot


angularmodule.ts


index.html


Output


Tuesday, September 26, 2023

Working with Angular Style Binding

 Style binding is a technique used by angular to define inline styles for any element dynamically.

The styles are defined in a function that can return a set of effects by using objects.

Syntax

public Effects() {

let styles= {

'color' :'red';

'font-weight' :'bold';

}

return style

}

The style are bound to any element by using "ngstyle" directive

Syntax:

<h2 [ngstyle]="Effects()" > Your Text </h2>

Example

Add a new   component

ng g c stylebinding


.ts changes

import { Component } from '@angular/core';

@Component({
  selector: 'app-stylebinding',
  templateUrl: './stylebinding.component.html',
  styleUrls: ['./stylebinding.component.css']
})
export class StylebindingComponent {
public backColor:any;
public textColor:any;
public Effects() {
  let styles= {
  'background-color' : this.backColor,
  'color': this.textColor,
  'text-align':'center'
  };
  return styles;
}
}

ScreenShot


html changes

<fieldset>
    <legend> Select Effects</legend>
    <dl>
    <dt> Background Color</dt>
    <dd>
        <select [(ngModel)]="backColor" >
            <option> Green </option>
            <option> Blue </option>
            <option> Red </option>
        </select>
    </dd>
    <dt>Text Color</dt>
    <dd>
        <select [(ngModel)]="textColor">
            <option> White </option>
            <option> Yellow</option>
            <option> Gray </option>
        </select>
    </dd>
    </dl>
</fieldset>
<h2 [ngStyle]="Effects()"> Style Binding</h2>

Screenshot


AppModule.ts


Index.html


Output


Working with Angular Class Binding Example

 Angular class binding is a technique used by angular to apply a css class for any element dynamically.

The dynamic classes are bound to elements by using ng class directive.

The ng class directive is used as a dynamic property for element that can refer to className.

The css classes are refered in three ways

1 String Type : It is used when you have to define any specific css class.

<div  [ngclass]="className" >

2 Refer as an Array

It is used when you have to define multiple css classes to element.

Example

<div [ngclass]="[class1','class2'......]">

3 Refer as an object

It is used when you want to turn on or off classes dynamically.


Dynamically Adding css classes to any Element.

Add a new component


.ts file changes

@Component({
  selector: 'app-classbinding',
  templateUrl: './classbinding.component.html',
  styleUrls: ['./classbinding.component.css']
})
export class ClassbindingComponent {
public effects: any
public isBackStyle:any;
public isTextStyle:any;
public isBorderStyle:any;
}

ScreenShot


Html Changes


<fieldset>
    <legend> Type Effects</legend>
    <input [(ngModel)]="effects"
    placeholder="eg:backEffects,textEffects,borderEffects" type="text"
    size="45">
</fieldset>
<br/>
<h2 [ngClass]="effects"> Angular </h2>
<fieldset>
    <legend> Choose Effects</legend>
    <ul>
        <li> <input [(ngModel)]="isBackStyle" type="checkbox">Back Effects</li>
        <li> <input [(ngModel)]="isBorderStyle" type="checkbox">Border Effects</li>
        <li> <input [(ngModel)]="isTextStyle" type="checkbox">Text Effects</li>
    </ul>
</fieldset>
<h2 [ngClass]="{backEffects:isBackStyle,textEffects:isTextStyle,borderEffects:isBorderStyle } ">
    SampleText
</h2>

appModule.ts


index.html


Output


Kubernetes

Prerequisites We assume anyone who wants to understand Kubernetes should have an understating of how the Docker works, how the Docker images...