Tuesday, November 7, 2023

Implementing Inventory Application in Angular

Requirement


Install Angular CLI and new Inventory -App


Let us create four new components, and we want to have it in the app-routing-module.ts

  • AboutComponent
  • AddproductComponent
  • DisplayComponent
  • DetailsComponent
Note:

In Realtime it is recommended to make AppModule[main module] as light weight by placing different components and routes into feature modules,this feature modules should be imported into AppModule


Now,  if I create a About Component using ng g c About --flat--> Then it will import and place the component in the app Module

 ng g c about --flat --module app-routing.module -->it will import and place component into approutingmodule


Now, this examples requires

 1.create a product class
 2.create a inventoryservice class[root|application level DI]
 3.create components and routes into AppRoutingModule
 4.import AppRoutingModule into AppModule [this will be done automatically]
 5.design the mainpage and run the app


tsconfig.json make the below changes in it

       ...
  "strict": false
       ...

   "strictTemplates": false


*create a class
  >ng g class product


product.ts

export class Product {
    constructor(public pid:string="",public pname:string="",public price:number=null)
    {}
}


Next, Create a Service

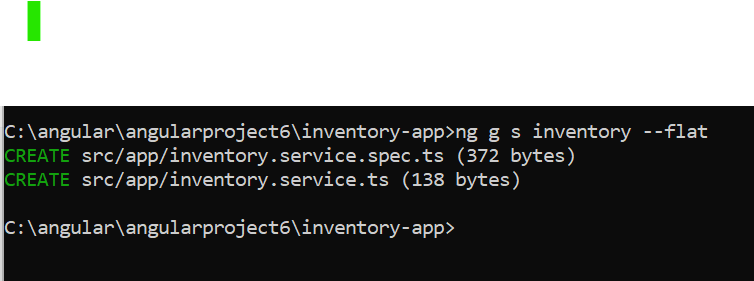
ng g s inventory --flat


By default it comes under root level


import { Injectable } from '@angular/core';
import { Product } from './product';

@Injectable({
  providedIn: 'root',
})
export class InventoryService {
  prods: Product[] = [
    new Product('p001', 'htc', 8000),
    new Product('p002', 'samsung', 10000),
  ];

  addproduct(pinfo: Product) {
    //para pinfo will receive product info from addproductcomponent
    this.prods.push(pinfo);
  }
  getprods(): Product[] {
    return this.prods;
  }
  getprod(pid1: string): Product {
    //para pid will receive prodid from detailscomponent
    let pinfo = this.prods.find((p) => p.pid == pid1);
    return pinfo;
  }
}


note:
Injectable decorator to a service class is mandatory for hierarchical and
application[or root] level DI, In real time it is recommended to apply
Injectable to a service class for any type of DI.


create components into approutingmodule[goto app-routing.module.ts]:


ng g c display --flat --module app-routing.module
ng g c about --flat --module app-routing.module
ng g c detail --flat --module app-routing.module
ng g c about --flat --module app-routing.module


about component.html

<h2>
    display shopping site info
</h2>


Add Products.ts


import { Component } from '@angular/core';
import { Product } from './product';
import { InventoryService } from './inventory.service';

@Component({
  selector: 'app-addproduct',
  templateUrl: './addproduct.component.html',
  styleUrls: ['./addproduct.component.css']
})
export class AddproductComponent {
  pinfo:Product=new Product();

  constructor(private _inventoryservice:InventoryService) {
    //para _inventoryservice will receive an object through DI
  }
  saveproduct()
  {
    this._inventoryservice.addproduct({...this.pinfo});
    //clear rec
    this.pinfo.pid="";
    this.pinfo.pname="";
    this.pinfo.price=null;
    alert("prod info saved..");
  }
}


Add Products.html

<div style="margin: 20px;">
    <input [(ngModel)]="pinfo.pid" placeholder="prodid"> <br>
    <input [(ngModel)]="pinfo.pname" placeholder="name"> <br>
    <input [(ngModel)]="pinfo.price" placeholder="price"> <br>
    <input type="button" value="save" (click)="saveproduct()">
   </div>


Note:  

Here we are using spread operator because 
>spread operator[...] create a new object based on pinfo object, this makes an object immutable.

If i pass,
this._inventoryservice.addproduct(this.pinfo);


In the next line we are clearing the values, so it will completely destroy the values in the array of pinfo(it will store in one address), so for that purpose we are using spread operator.

Note:
                   
                                                            addproduct(pinfo)             prods array
pinfo-pid-p001 pname-xyz price-1000------------------------>   address[pid-"" ..]

this.pinfo.pid=""
                                addproduct(new Product(pinfo.pid,
                                          pinfo.pname,pinfo.price))--->new object[pid-p001 ..]
                                               |
                                         {...this.pinfo}


Display Component.ts

import { Component } from '@angular/core';
import { Product } from './product';
import { InventoryService } from './inventory.service';

@Component({
  selector: 'app-display',
  templateUrl: './display.component.html',
  styleUrls: ['./display.component.css']
})
export class DisplayComponent {
  prods:Product[];
  constructor(private _inventoryservice:InventoryService) {
     this.prods=this._inventoryservice.getprods();
   }
}


Display Component.html


<table style="font-size:x-large;margin:20px" border="1">
    <tr>
        <th>prod id</th>
        <th>name</th>
        <th>option</th>
    </tr>
    <tr *ngFor="let p of prods">
      <td>{{p.pid}}</td>
      <td>{{p.pname}}</td>
      <td>
        <a [routerLink]="['/details',p.pid]">More..</a>
      </td>
    </tr>
  </table>


Details component.ts

import { Component } from '@angular/core';
import { InventoryService } from './inventory.service';
import { ActivatedRoute } from '@angular/router';
import { Product } from './product';

@Component({
  selector: 'app-detail',
  templateUrl: './detail.component.html',
  styleUrls: ['./detail.component.css']
})
export class DetailComponent {
  pinfo:Product;
  constructor(private _inventoryservice:InventoryService,private _activatedroute:ActivatedRoute)
  {
    this._activatedroute.paramMap.subscribe((paras)=>{
           this.pinfo=this._inventoryservice.getprod(paras.get("pid"));
    }
   );
  }
}


Details Component.html

<div style="font-size:x-large;margin:20px;border:2px solid black;padding:15px">
    prodid: {{pinfo.pid}} <br>
      name: {{pinfo.pname}} <br>
     price: {{pinfo.price}} <br>
     <a routerLink="/display">Goto Prev Page</a>
   </div>


appRoutingModule.ts


import { NgModule } from '@angular/core';
import { RouterModule, Routes } from '@angular/router';
import { AboutComponent } from './about.component';
import { DisplayComponent } from './display.component';
import { AddproductComponent } from './addproduct.component';
import { DetailComponent } from './detail.component';
import { FormsModule } from '@angular/forms';
import { CommonModule } from '@angular/common';

//declare routes
const routes: Routes = [
  {path:'about',component:AboutComponent},
  {path:'addproduct',component:AddproductComponent},
  {path:'display',component:DisplayComponent},
  {path:'details/:pid',component:DetailComponent}
];

@NgModule({
  imports: [RouterModule.forRoot(routes),FormsModule,CommonModule],
  exports: [RouterModule],
  declarations: [
    AboutComponent,
    DisplayComponent,
    AddproductComponent,
    DetailComponent
  ]
})
export class AppRoutingModule { }


Note

1.FormsModule is required for ngModel directive[used in addproductcomponent]
2.CommonModule  "    "     "  *ngFor directive[used in displaycomponent]


*AppModule will import AppRoutingModule[this will be done automatically by cli]
  goto app.module.ts


app.component.html


<h2>Welcome To Shopping Site</h2>
<div style="font-size:xx-large">
<a routerLink="about">About</a> |
<a routerLink="addproduct">AddProduct</a> |
<a routerLink="display">Display</a>
</div>
<hr>
<router-outlet></router-outlet>


Output


Clicking on Add Product


on Clicking on More


Clicking on the Previous Page


POSTMAN to test Web API

It is most powerful HTTP client for testing restful web services. Postman makes it easy to test the Restful Web APIs.


Step 1:  Download and install POSTMAN from Postman

Step 2: Once the Postman is successfully installed, open the Postman. It will look like the image shown below.

GET Request using Postman:

Select the HTTP Method as “GET” and enter the URL of your Web API as shown in the below image.


Once you click on the Send button, an HTTP request is sent to the provided URL. The response coming from the Web API Server is displayed in the below image.


POST Request using Postman:

  1. Choose the HTTP verb as POST
  2. Set the URL
  3. Set the Content-Type as application/json. To do this click on the Header tab and provide the key value as shown in the below image


Next, we need to provide the string value that we want to add to the string array. We need to provide string values in the request body. To do so click on the body tab and provide the string value as shown below.


Kubernetes

Prerequisites We assume anyone who wants to understand Kubernetes should have an understating of how the Docker works, how the Docker images...