The Angular Routing is a mechanism which is used for navigating between pages and displaying appropriate component or pages on the browser.
It also allows us to maintain the state, implement modules, and then loads the modules based on the roles of the user.
Mapping client request URL path to a component is called routing, this
 will load component dynamically for presentation
   (or)
 Loading one component into another component dynamically is called
 "routing"

Routing provides navigation with in angular app
Website with single main page and other pages will be loaded as a part of mainpage without reloading|refreshing mainpage is called SPA (or) Single webpage of a website is providing access to all the content of website is called SPAsyntax: const routes: Routes=[ {path:'path1',component:component1}, {path:'path2',component:component2, children:[ {path:'cpath1',component:ccomponent1}, ... ]}, { ... }, {path:'',component:..}, {path:'**',component:...} ];path:'**' will be considered for invalid route path->children routes will provide inner navigation mainpage home ... services [parent level navigation] | training --------- training info consultancy--------- .... [children navigation]->routes collection should be loaded into a module using RouterModule.forRoot methodUnderstanding Angular Routing
Assume, that , I have two linksEmployee DetailsDepartment DetailsWhen , we click on the Employee Details, we need to display the Employee Details,Similarly when we click on the Department Details, we need to display the Department DetailsCreating Employee Details Component:
Employee Details . html ChangesDepartment Details (html)Adding Routing in Angular:
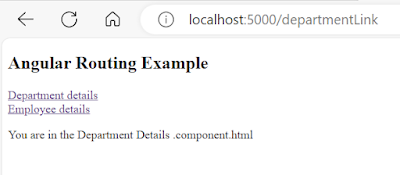
When you are creating an angular application, at the time of creation it is asking whether you want to add angular routing to your project or not. If you select yes, then it automatically add the routing model in your project. If you select no then you need to add it manually.When creating an angular application , at the time of creation we will see the below screenIf you select yes, it will automatically add the routing Model to your project.We need to use the below CLI code to generate the router in Angular Application.Configuring Routes in Angular Applicationyou need to configure the path and their respective component in the AppRoutingModuleimport { NgModule } from '@angular/core';import { RouterModule, Routes } from '@angular/router';import { EmployeeDetailsComponent } from '../employee-details.component';import { DepartmentDetailsComponent } from '../department-details.component';const routes: Routes = [{path:'employeeLink', component:EmployeeDetailsComponent},{path:'departmentLink', component: DepartmentDetailsComponent}];@NgModule({imports: [RouterModule.forRoot(routes)],exports: [RouterModule]})export class AppRoutingModule { }appModule.ts.html ChangesDefault when loads, the below page gets displayedOn Clicking on the Department DetailsFrom the above HTML Code, we need to understand two important concepts i.e. routerLink and router-outletRouter-outlet:
this is a container | placeholder with in a main page to load | display component infoorThe Router Outlet is a dynamic component that the router uses to display views based on router navigation.So, the role of <router-outlet> is to mark where the router displays the view. This is the location where angular will insert the component.Router Link
This will bind route path to html element[hyperlink],html element click will load corresponding route path component into router-outlet of main page.ORWith the help of router Link directive, you can link to routes of your application right from the HTML Template. You just need to add the directive to an HTML Element. When the user clicks on that element, angular navigates to that specified location.note: routerLink is similar to hrefSyntax: <a routerLink="pathname">text</a> (or) <a [routerLink]="['/pathname',para1value,..]">text</a>Router Link: Server side
For your application to work with server side rendering, the element hosting directive has to be a link (anchor) element.It is also possible to navigate to a route from code. To do so, we need angular router and this need to be done in your typescript file.We need to import the below import statementimport { Router } from '@angular/router';second thing is add the below constructorconstructor(private router : Router){}third thing isOnce we have the router, then the navigation is quite simple. Just call the navigate function or Router. This function takes an array. The first element of the array defines the route we want to navigate. The second is optional and allows us to pass a route parameter. The syntax is given below.this.router.navigate['/departmentLink', 1234];Example.ts Changesimport { Component } from '@angular/core';import { Router } from '@angular/router';@Component({selector: 'app-jsondemo',templateUrl: './jsondemo.component.html',styleUrls: ['./jsondemo.component.css']})export class JsondemoComponent {constructor(private router : Router){}GetDepartmentDetails(){this.router.navigate(['/departmentLink']);}GetEmployeeDetails(){this.router.navigate(['/employeeLink']);}}.html Changes<h2>Angular Routing Example</h2><button (click)="GetDepartmentDetails()">Department Details</button><button (click)="GetEmployeeDetails()">Employee Details</button><div><router-outlet></router-outlet></div>OutputInitially when page Loads5.routerLinkActive--this is used to apply css to active link 6.Router class--this is used to redirect user from one component to another component programmatically [it is similar to response.redirect] syntax: this._router.navigate(['/pathname',..]);


No comments:
Post a Comment
Thank you for visiting my blog